How to acquire VITA on Uniswap

This article will guide you through the process of using Uniswap to obtain VITA, VitaDAO’s token. For more information on VitaDAO itself, see this blog post as well as further links at the bottom of this article. If you have any question, do get in touch on Discord, Telegram or Twitter.
💡 Be sure to obtain authentic VITA
The original and only token contract address of the VITA token is 0x81f8f0bb1cb2a06649e51913a151f0e7ef6fa321. Any token with another contract address — even if also called “VITA” — must be fake. Make sure that you obtain authentic VITA by using this and only this pool on Uniswap.
1. Prerequisites
In order to obtain VITA on Uniswap, you will need
1️⃣ the public address of your Ethereum wallet
and
2️⃣ Etherum tokens (ETH) or USDC equivalent to the amount you would like to acquire VITA tokens for, plus additional resources for gas costs (that is, transaction fees).
In case you already have both 1) and 2) in place, you may skip to section 3 “How to obtain VITA on Uniswap”.
2. What does this mean and what do I need to do?
1️⃣ The public address of an Ethereum wallet of yours
Unless you already have an Ethereum wallet on which you would like to hold your VITA tokens, you will need to create a new one. Please note, an exchange account does not work and cannot be used to obtain VITA tokens from Uniswap.
While there are many Ethereum wallet options, we recommend the following:
1. Install a Chromium-based browser, such as Chrome, Brave, Firefox or Edge.
2. Install the browser extension MetaMask, a reputable and easy-to-use Ethereum wallet.
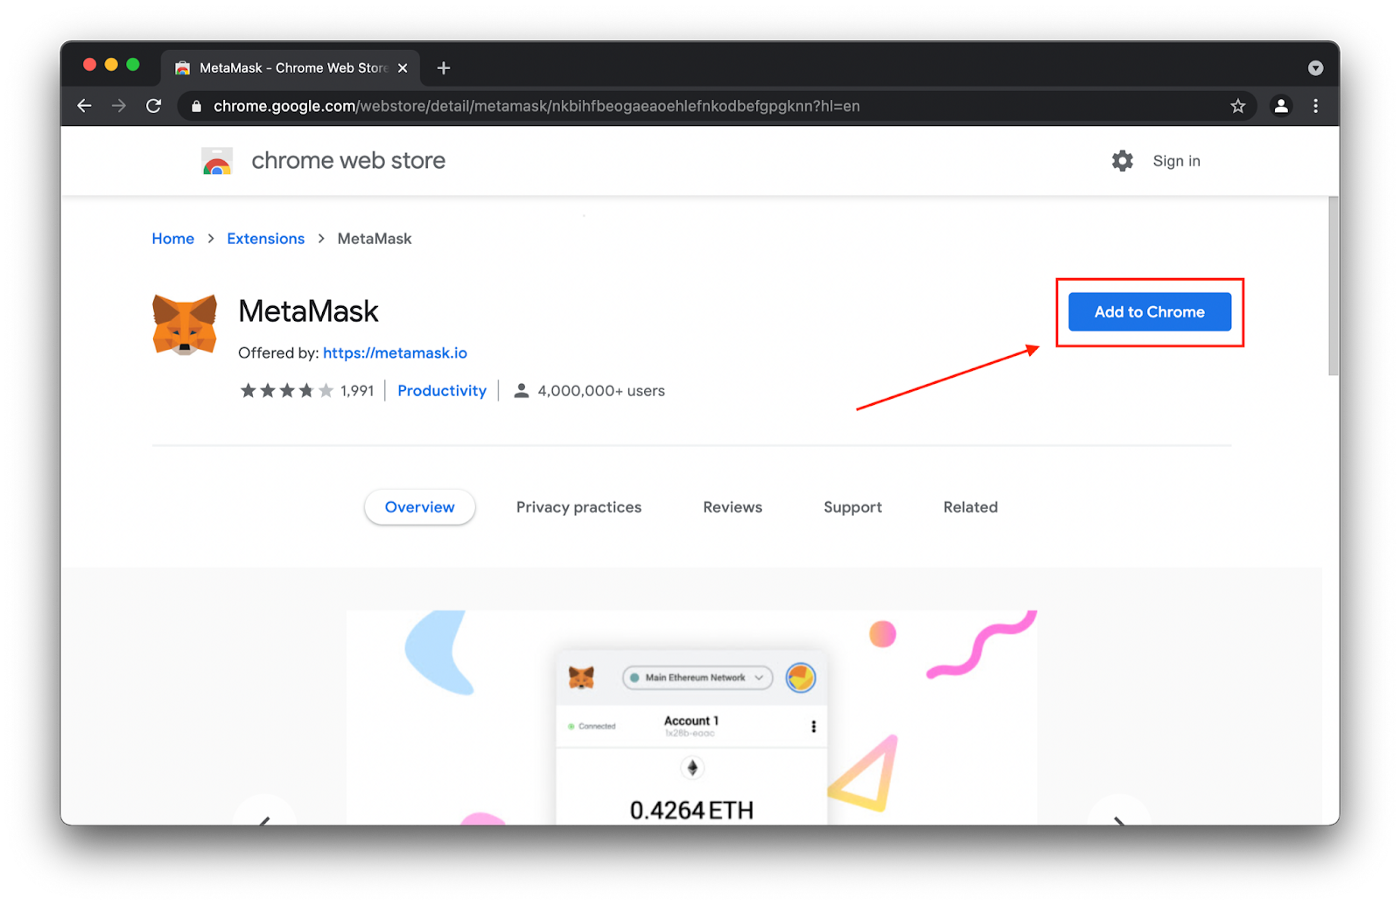
3. When prompted, allow the extension to be added to your browser.

4. Click on “Get Started”.
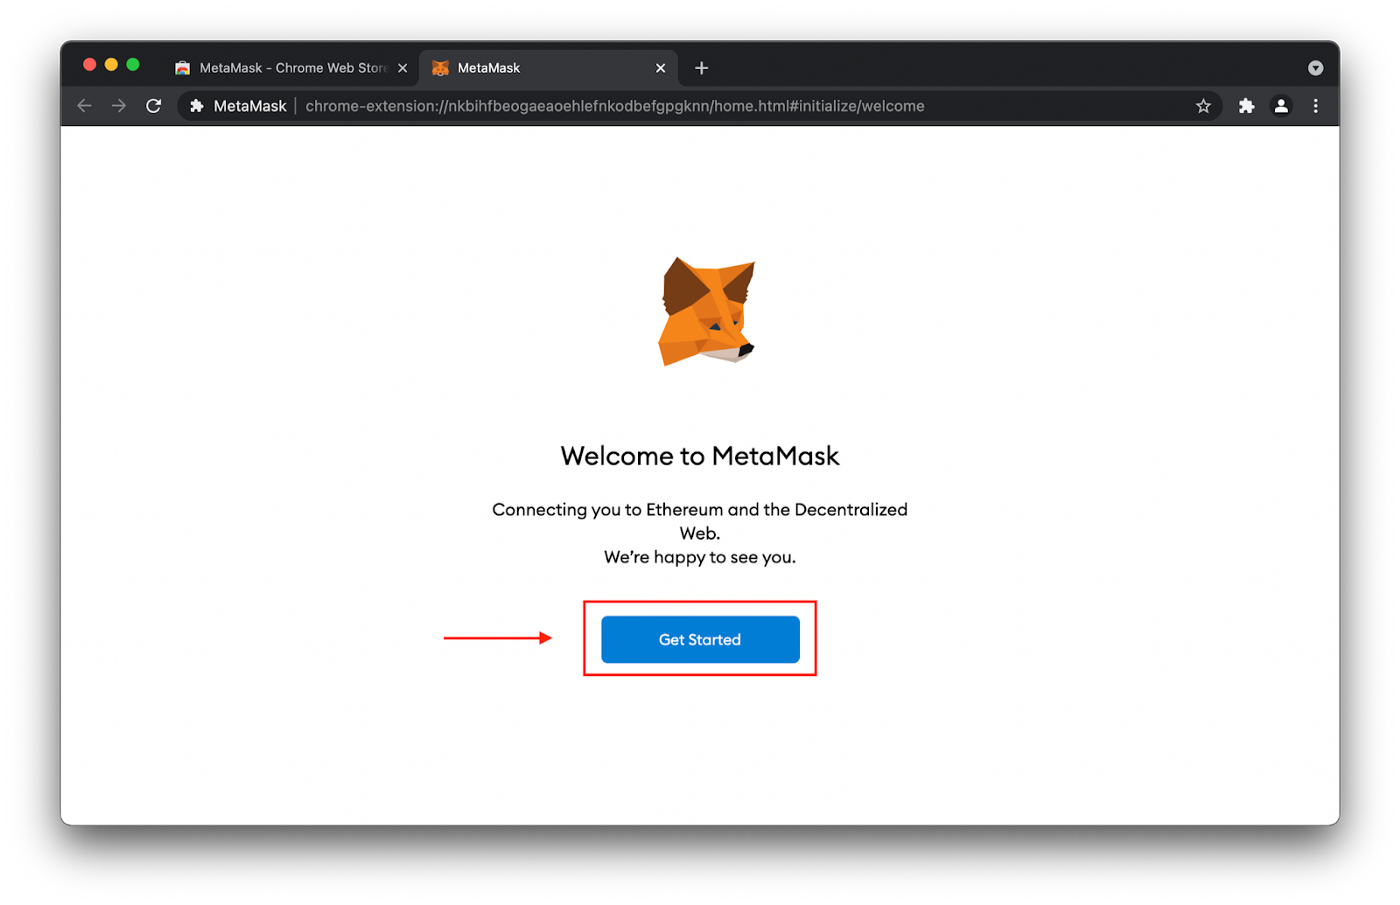
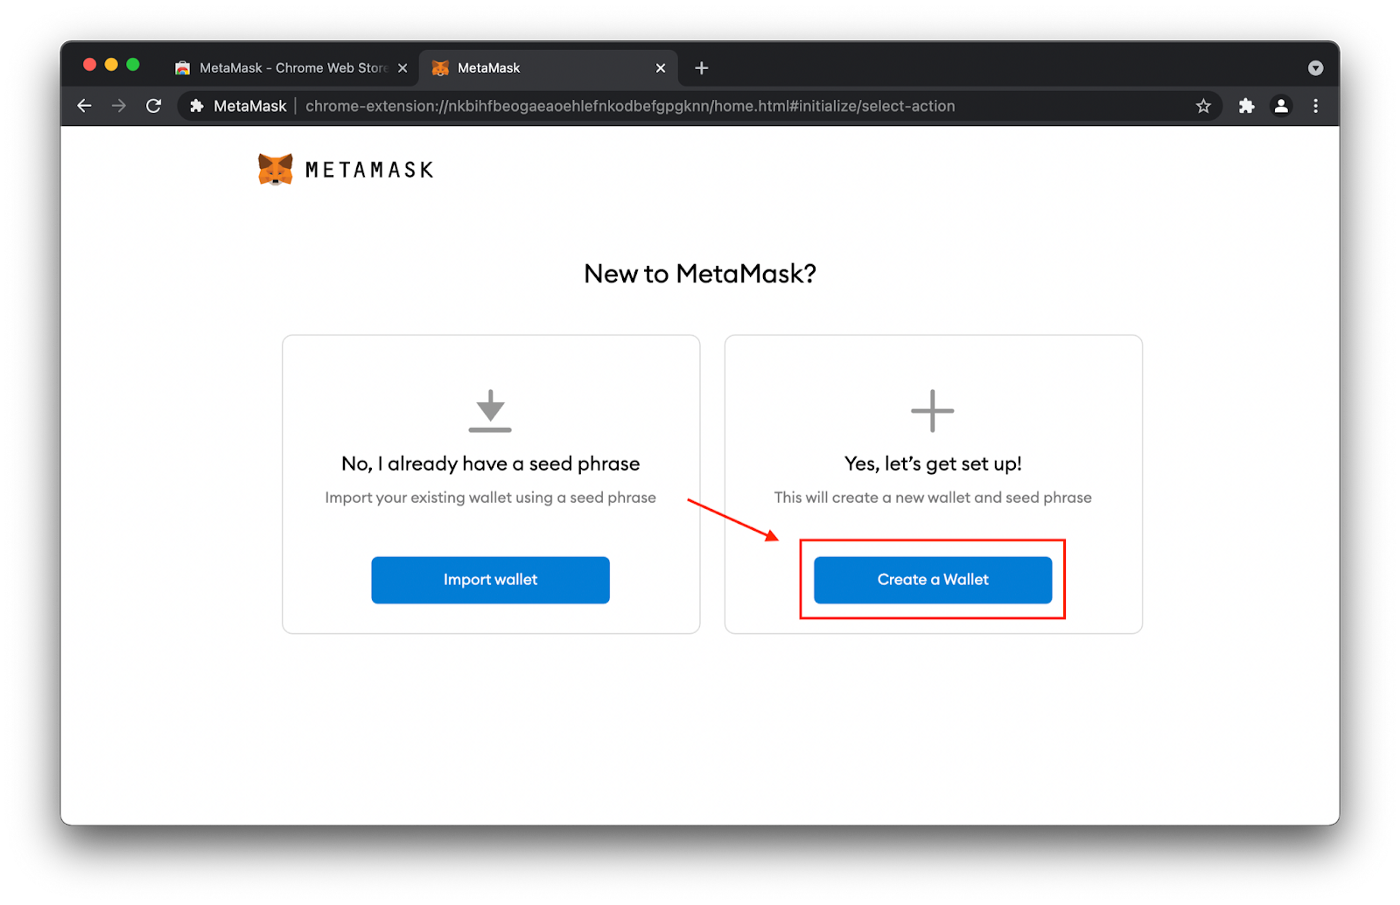
5. Click on “Create a Wallet” and, on the next screen, choose whether you would like to provide MetaMask with optional analytical data.
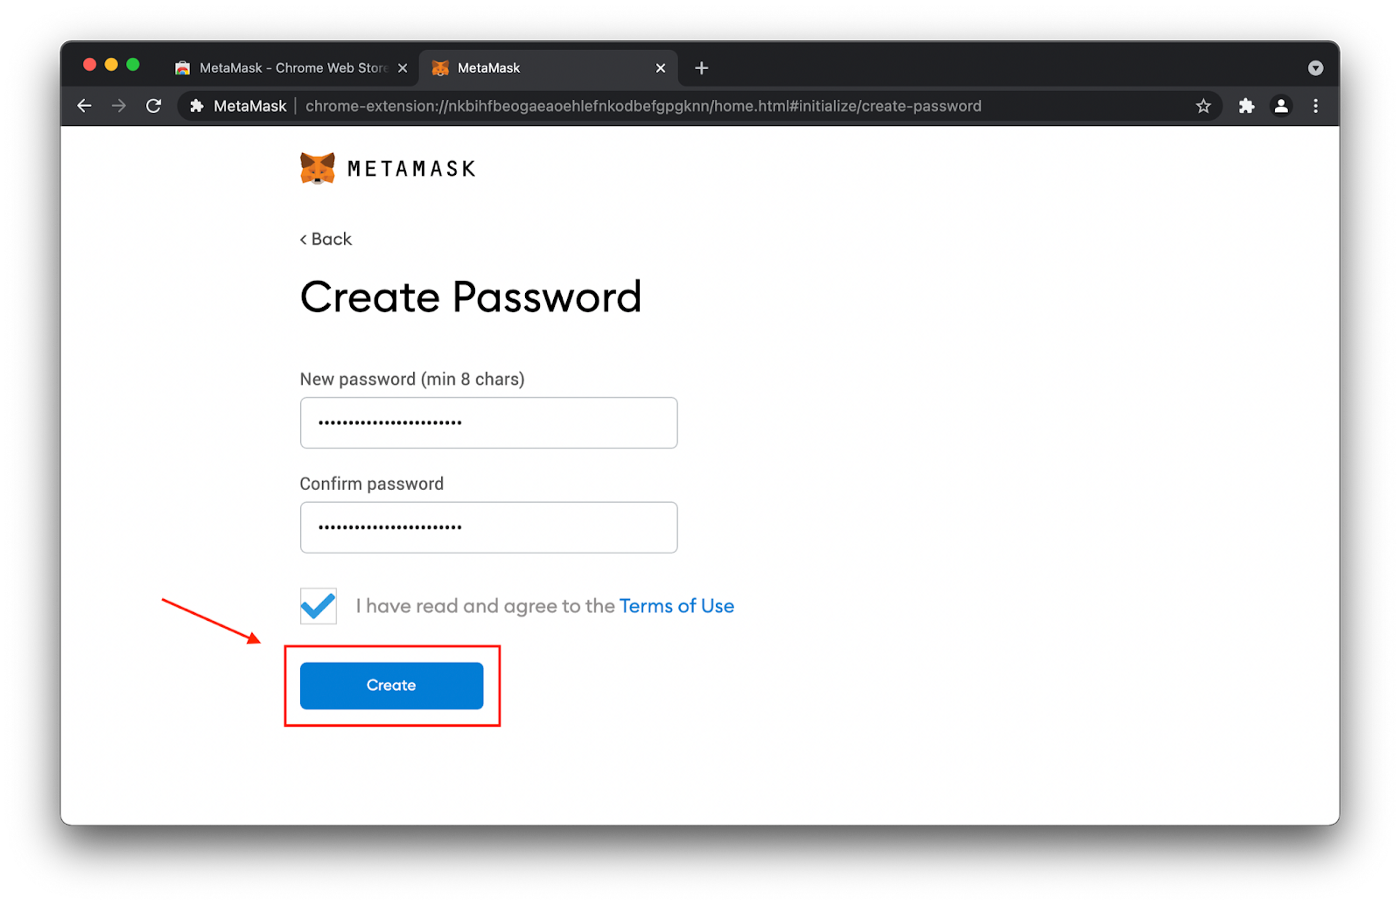
6. Choose a secure password and agree to the Terms of Use. In terms of password security, we recommend you think of your MetaMask wallet like a bank account. Make it a secure password and store it in a safe place, such as a password manager.
7. Very important: Follow the instructions on your screen carefully in order to back up your “backup phrase”. This phrase, and only this phrase, guarantees you access to your Ethereum wallet and your VITA tokens.You must not disclose this phrase to others. If you lose this phrase, you cannot restore your account and lose your tokens. Make sure you keep it safe.
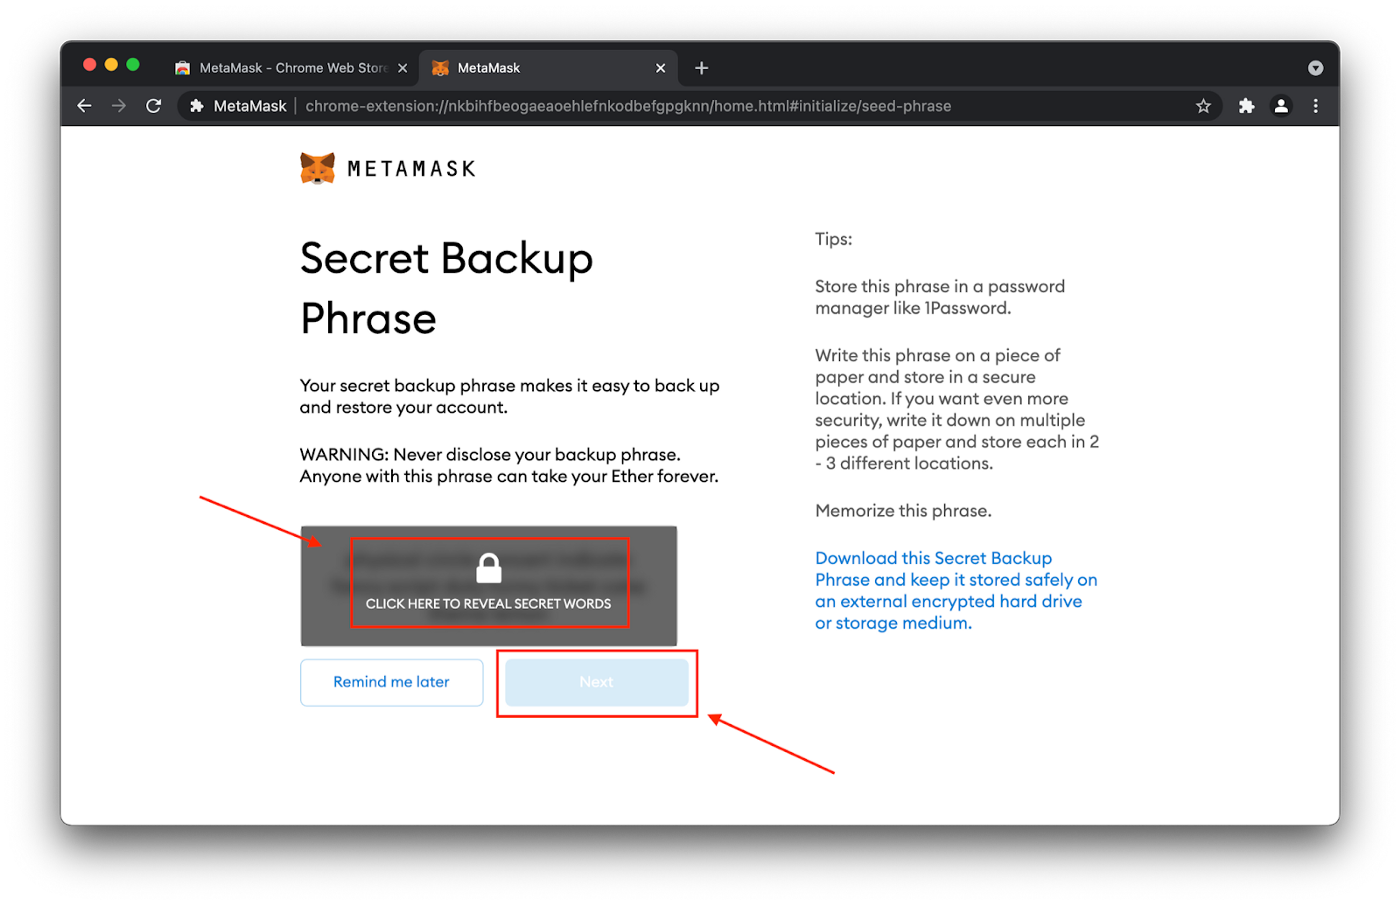
8. Confirm your phrase and continue.
9. Now, if you see this screen, MetaMask is set up successfully.
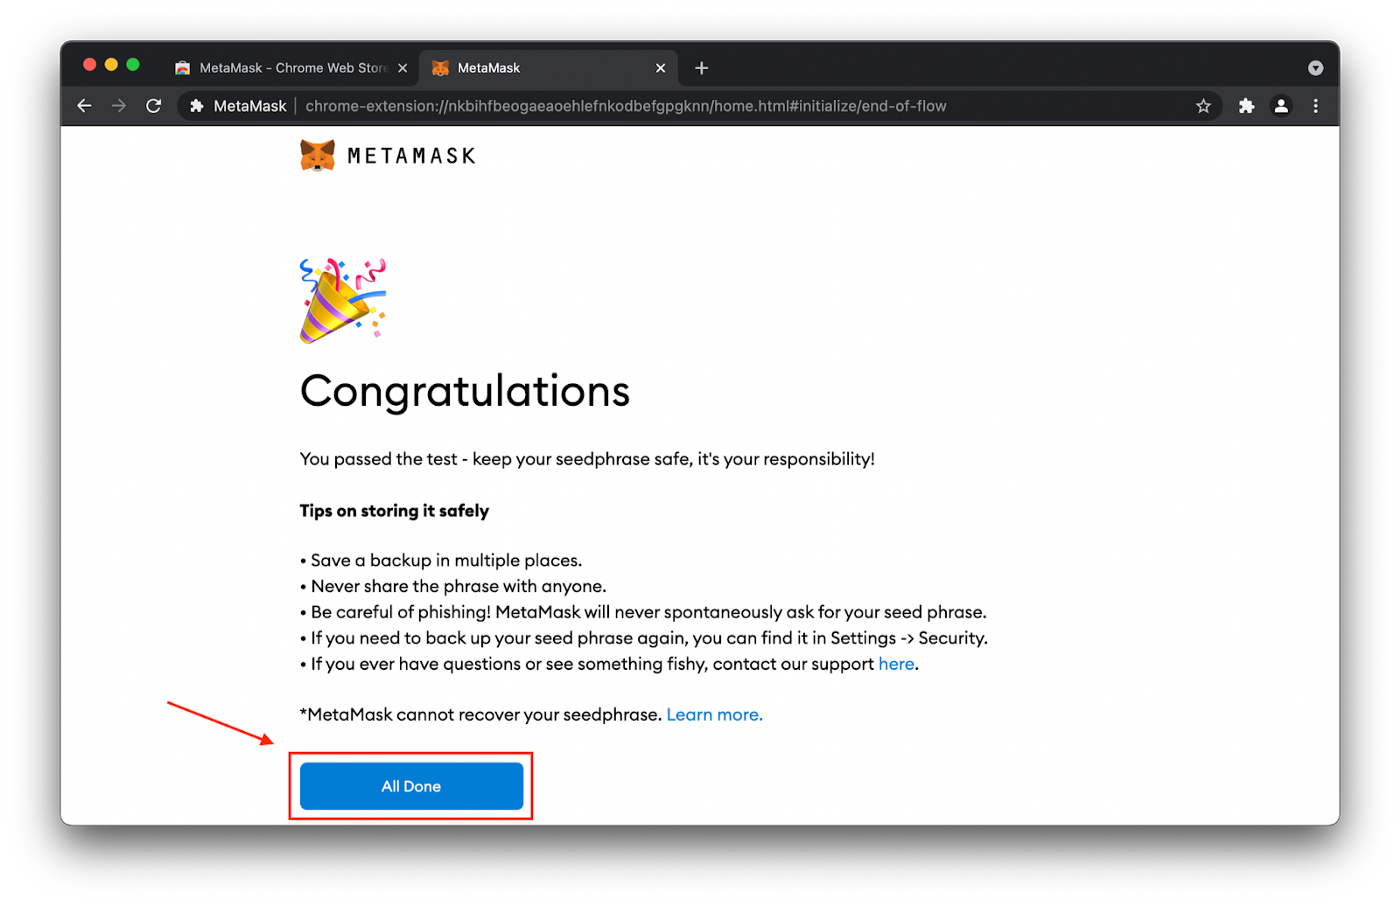
10. Dismiss the release notes and make yourself comfortable with the overview page of your newly created Ethereum wallet.
11. Finally, move your mouse cursor to the top where it says “Account 1”, click left to copy your public Ethereum address to your clipboard and save it for later. You will need it in the next section in order to top up ETH.
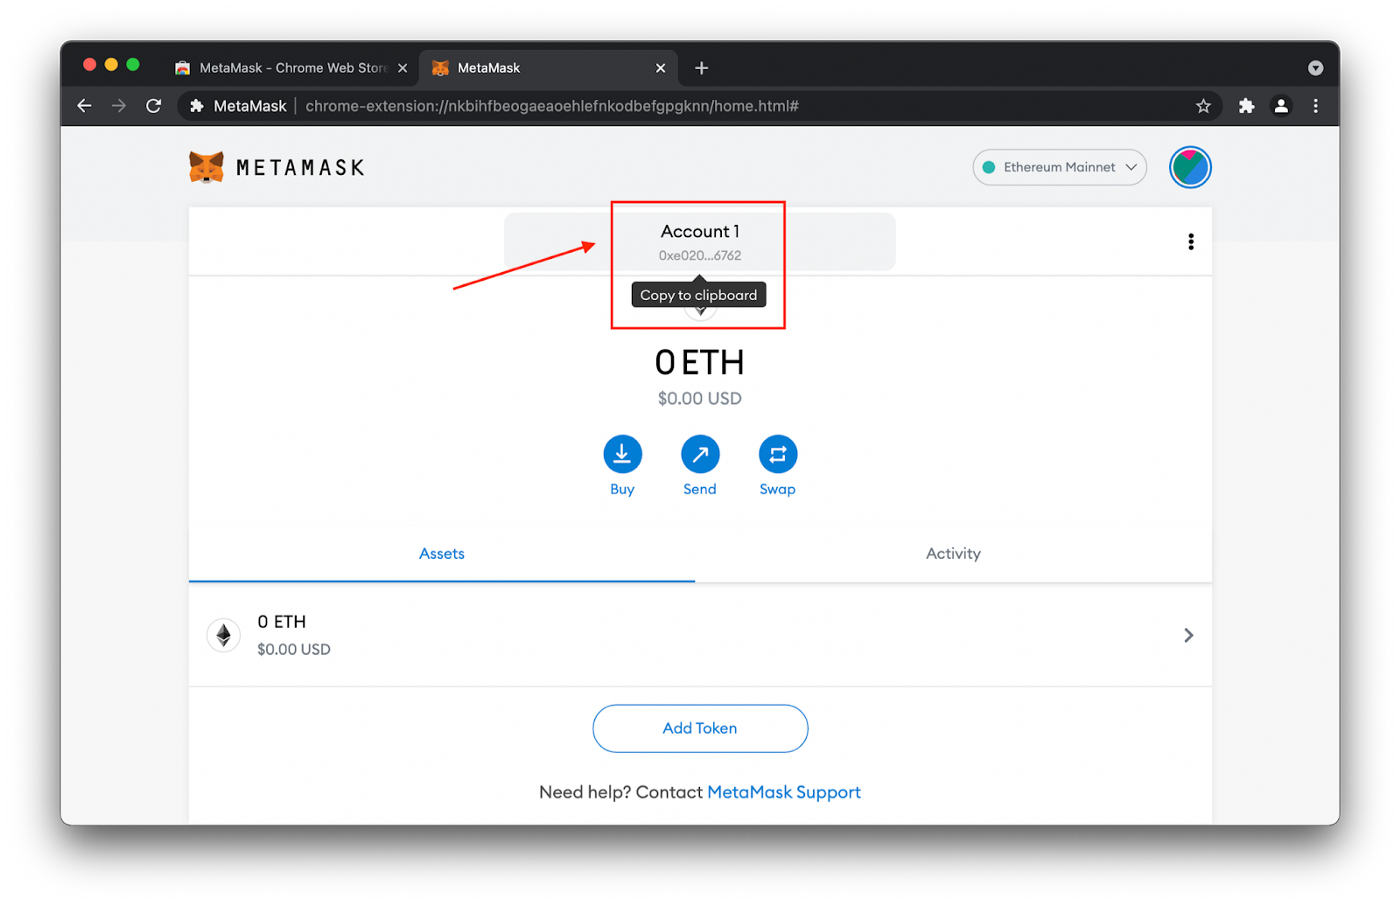
2️. ETH or USDC equivalent to the amount you would like to buy VITA tokens, plus additional ETH for “gas costs”
1. Go to an exchange of your choice. Any exchange where you can acquire ETH will work, including popular exchanges like Coinbase or Binance. Depending on your jurisdiction, your options may be limited. Note that registering a new account with any exchange may take a few days of processing time, especially due to Know Your Customer (KYC) procedures.
Note: On Uniswap, you can use ETH or any ERC-20 token like USDC. The fees are the lowest for USDC, which is why this is the optimum asset to acquire VITA with. However, using ETH is more convenient and only slightly more costly in terms of fees, which is why the following steps only explain how to acquire ETH.
For simplicity, we recommend one of the following:
- Ramp Network (click here for their FAQ)
or
- Wyre Widget, which you can use directly in MetaMask (click here for their FAQ)
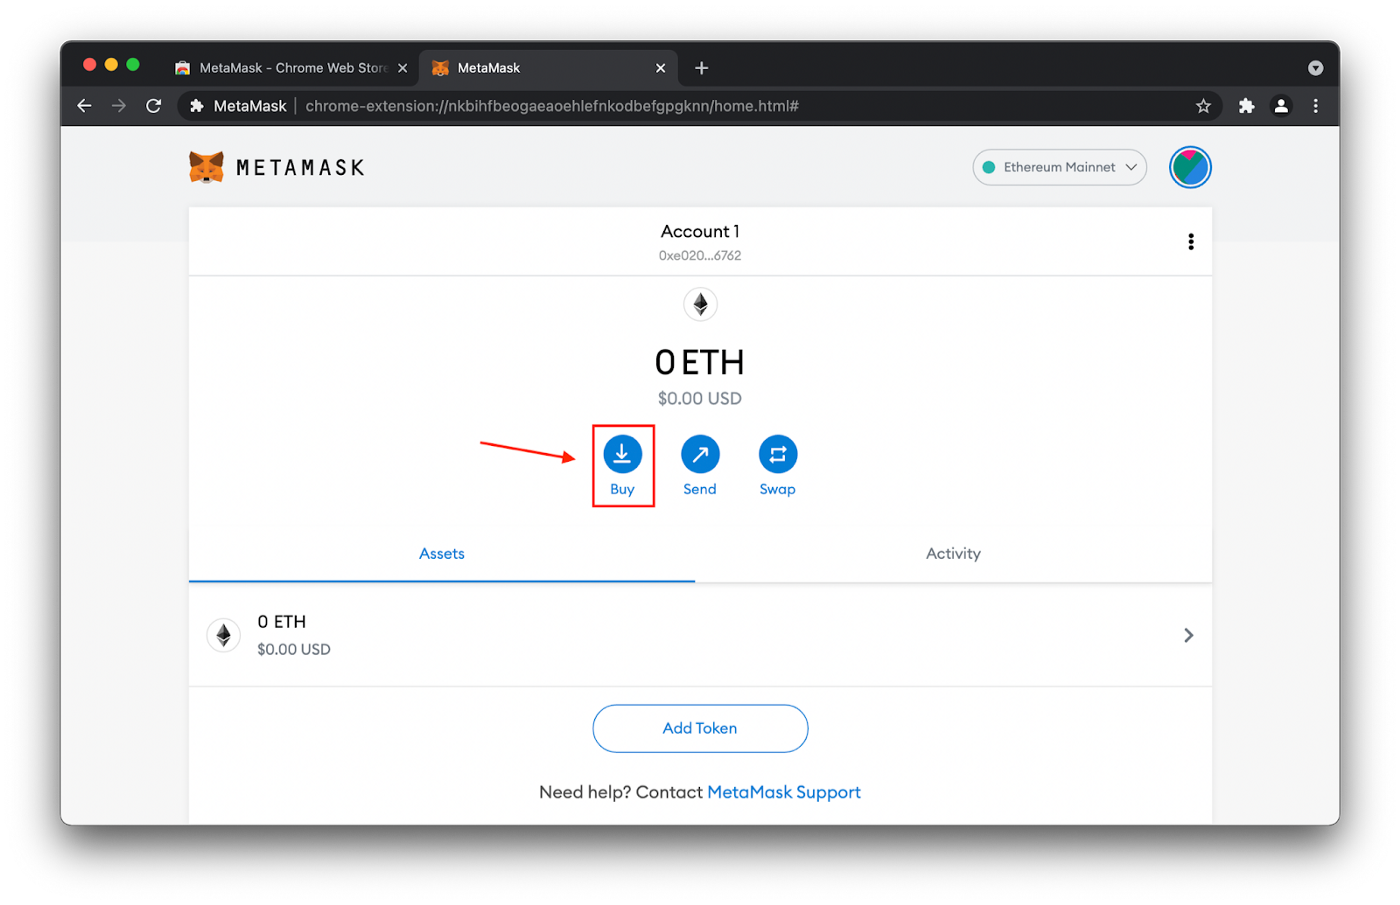
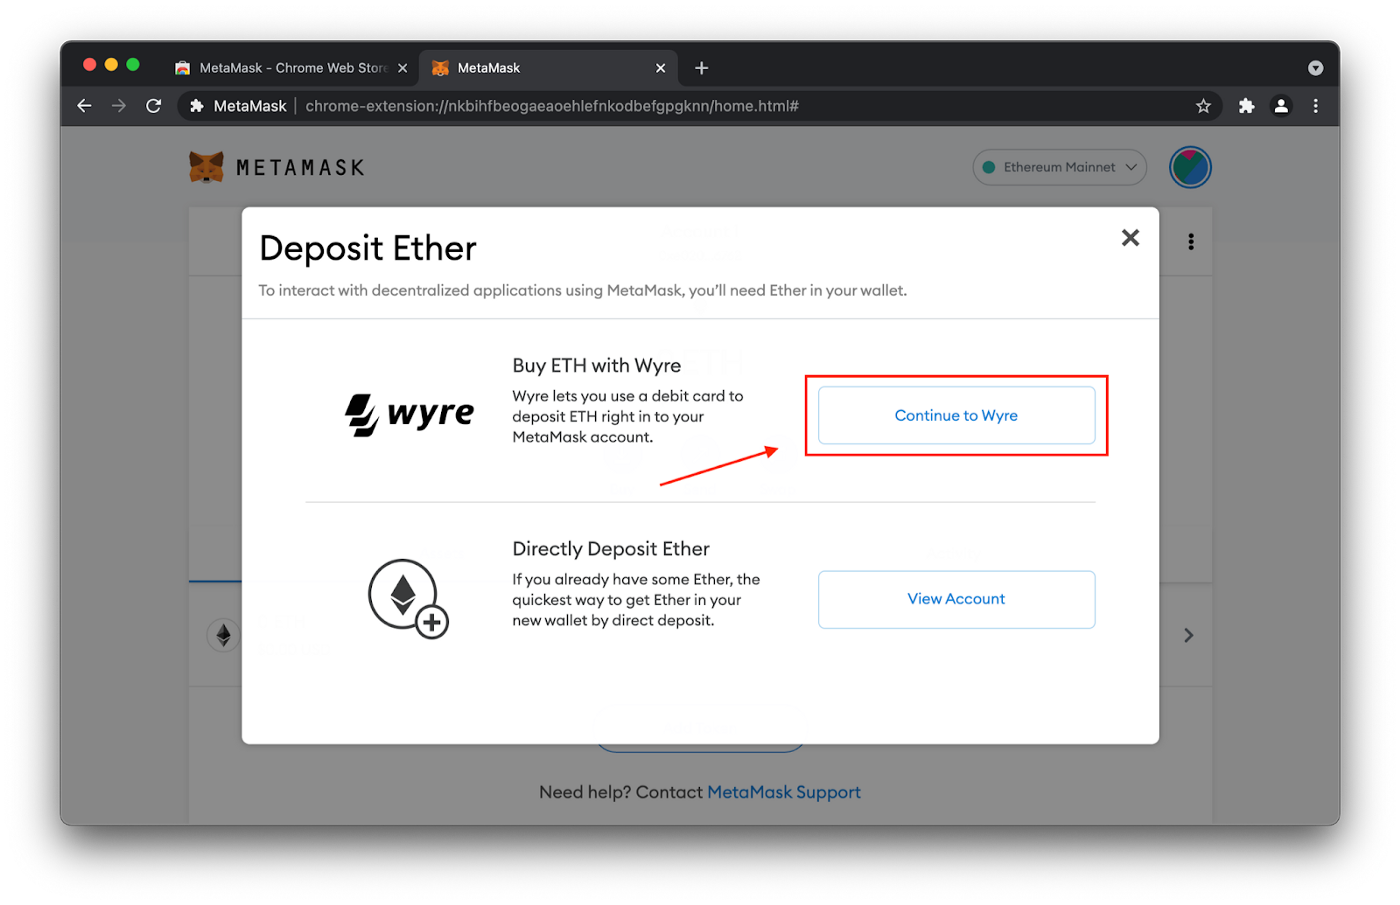
2. Acquire ETH of
- the amount that you would like to buy VITA tokens for
and
- approximately 0.02 ETH or the USDC equivalent additionally, in order to account for all possible transaction fees
3. Transfer your ETH to your wallet using the public Ethereum address you noted down in step 11 of the last section. When making a withdrawal/transfer, always double check your public Ethereum address is correct. If you enter the wrong address, your funds will be irreversibly lost. Transferring ETH to your own wallet may take several minutes to confirm.
Note: Depending on which exchange you chose in step 1, your ETH may transfer directly to your Ethereum wallet, e.g. when using Ramp or Wyre. In that case, this step is irrelevant.
4. Finally, open MetaMask and ensure the account balance in your Ethereum wallet is as you expect it to be. If you just withdrew your ETH from an exchange, it may take several minutes for your funds to arrive.
5. Now, you are all set to acquire VITA on Uniswap.
3. How to obtain VITA on Uniswap
Step 1 : Import VITA token
Go to the pool of the official VITA token on Uniswap v3 by following one of the links mentioned below. First, you will need to manually import the VITA token. Since VITA is a relatively new token that has been existing only for a few days, it is not yet listed on what is known as Uniswap Lists. In the meantime, you need to manually import VITA but be mindful of fake tokens.
Only use one of the following links:
- If you want to exchange ETH for VITA, click here.
- If you want to exchange USDC for VITA, click here.
- If you want to exchange another ERC-20 token for VITA, click here and later manually your desired token.
To be sure, compare the Uniswap URL to this Etherscan URL of the official token contract. Both must refer to the address 0x81f8f0bb1cb2a06649e51913a151f0e7ef6fa321.
If everything seems fine, click on “Import”.
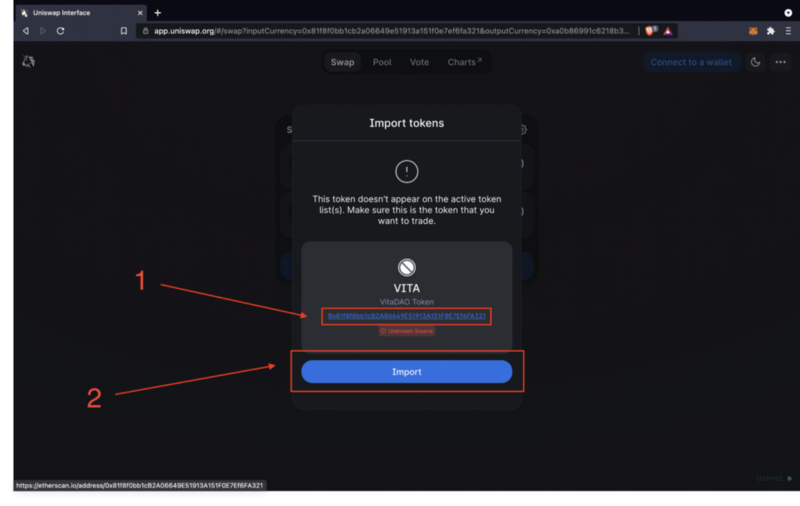
Step 2: Connect your wallet
In the top right-hand corner, click on “Connect to a wallet”.
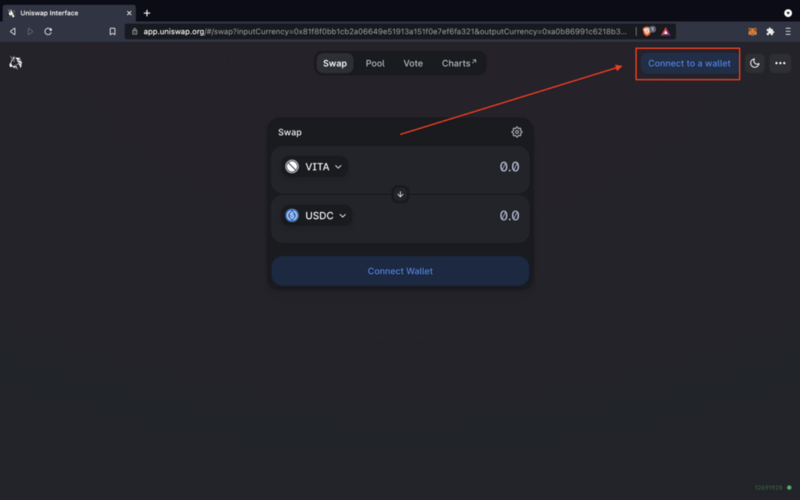
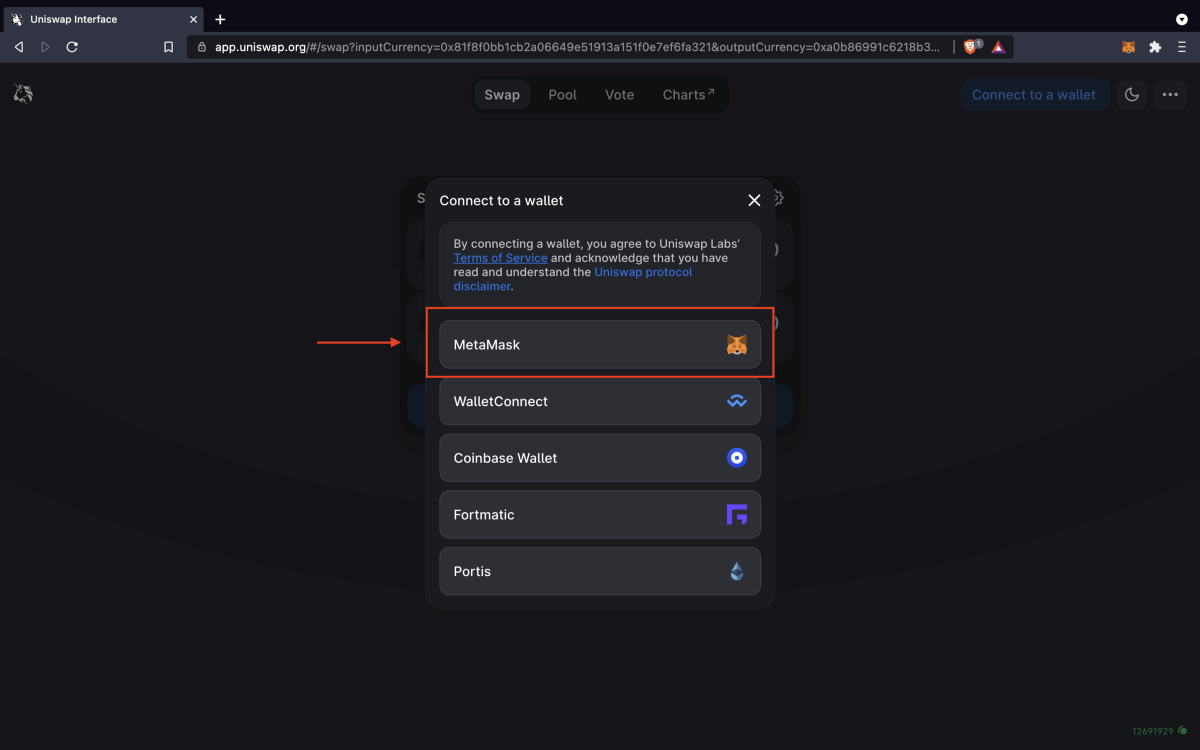
Select a wallet of your choice by clicking on it. Any of the given options will work. In this guide, we will be using MetaMask.
Next, a pop-up will appear. Select the wallet you earlier transferred USDC and/or ETH. Click “Next”.
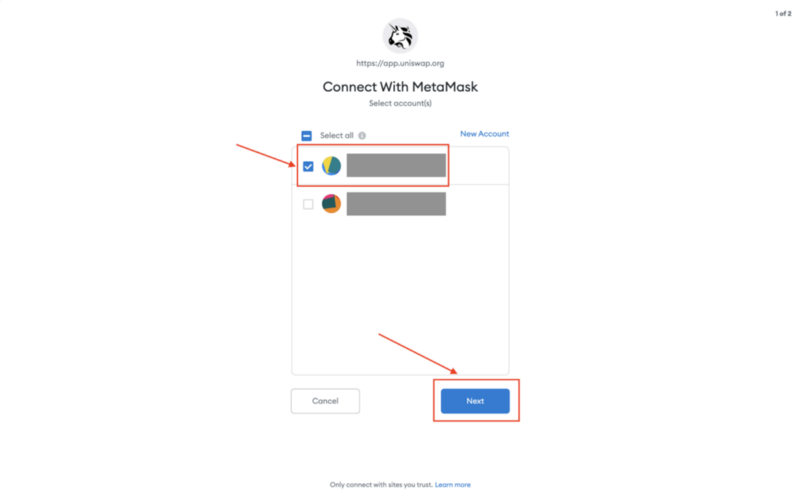
Finally, click “Connect”.
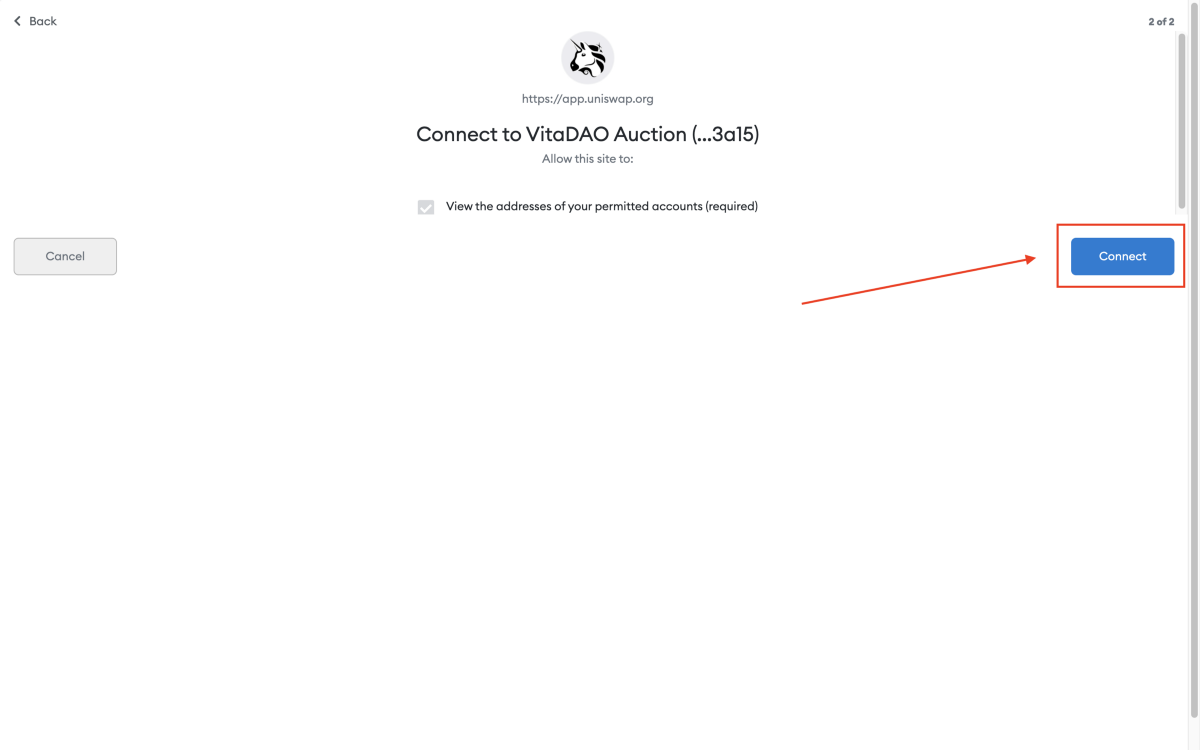
The pop-up will close automatically and you will see the Uniswap page again.
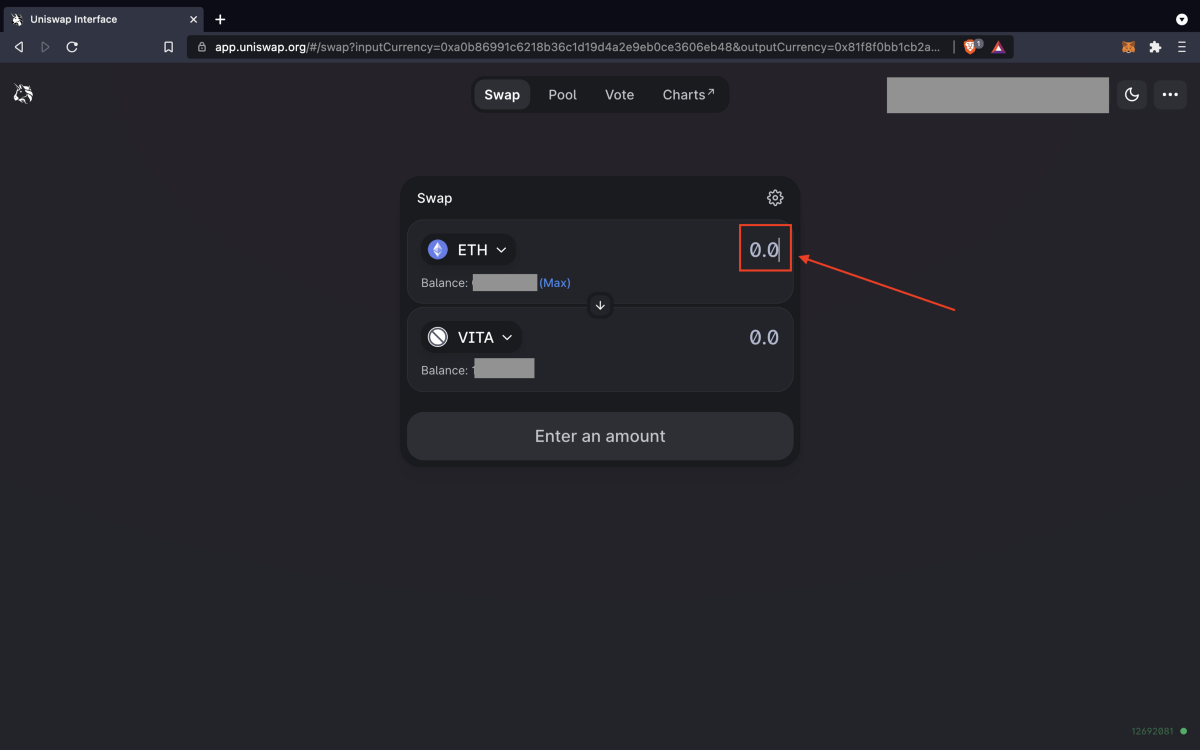
Step 3: Enter the desired amount
Now, you can specify the desired amount of USDC or ETH you would like to spend on acquiring VITA tokens. Alternatively, you may also enter the desired amount of VITA you would like to acquire and let Uniswap calculate the corresponding amount in USDC or ETH respectively.
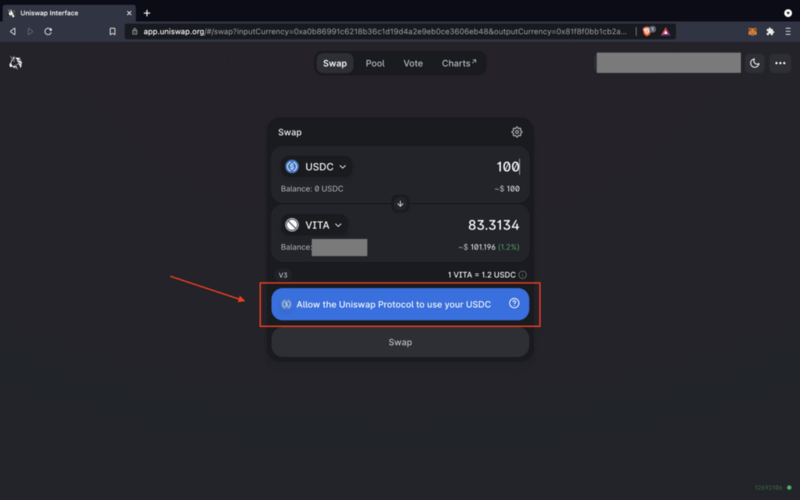
[If applicable] Step 4: Approve tokens
If you are using Uniswap for the first time, you will likely have to approve the use of your tokens first. To do so, click the blue button. You will then need to confirm the transaction in your MetaMask wallet.
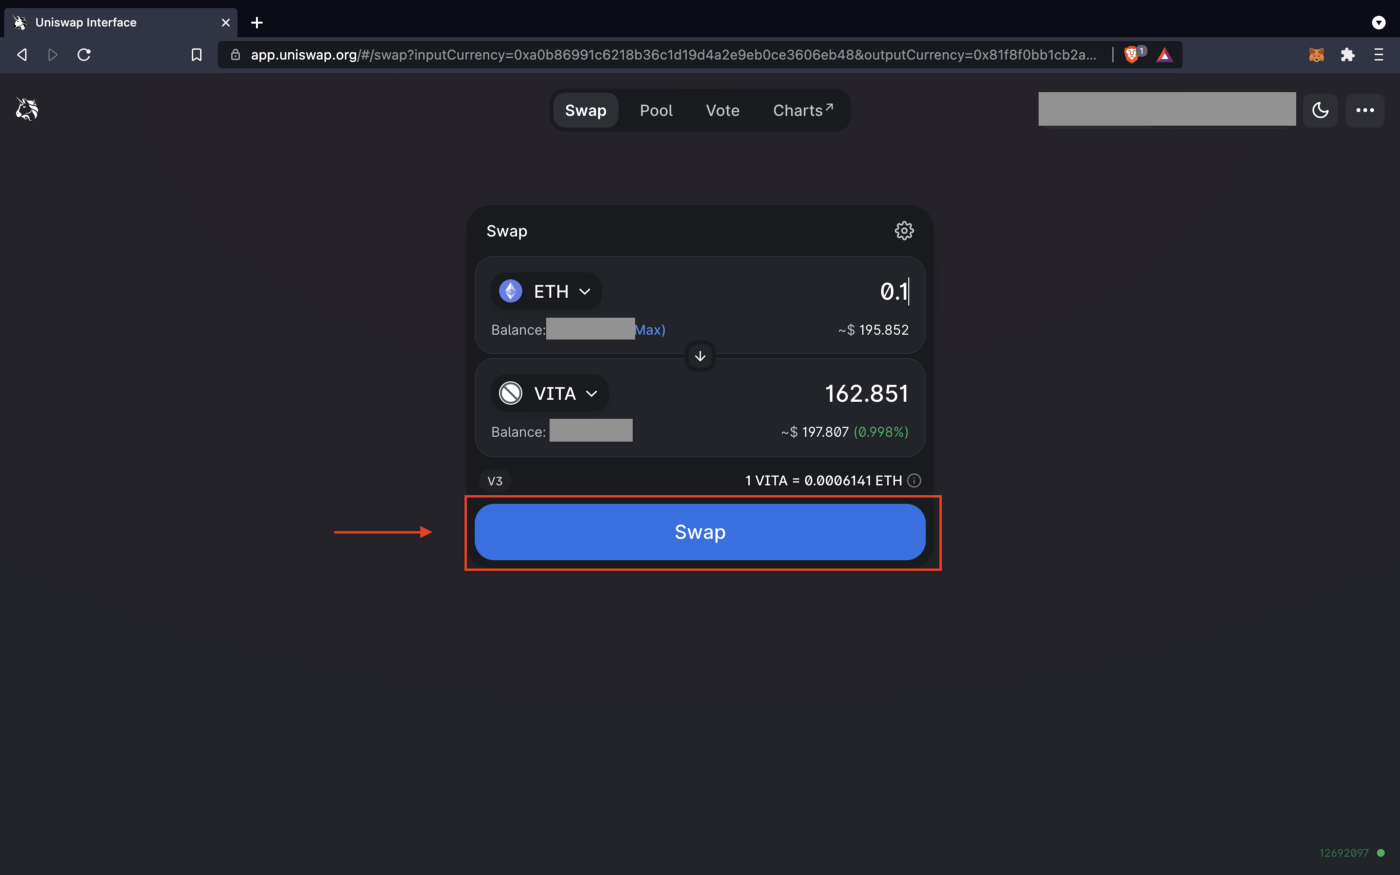
Step 5: Confirm swap
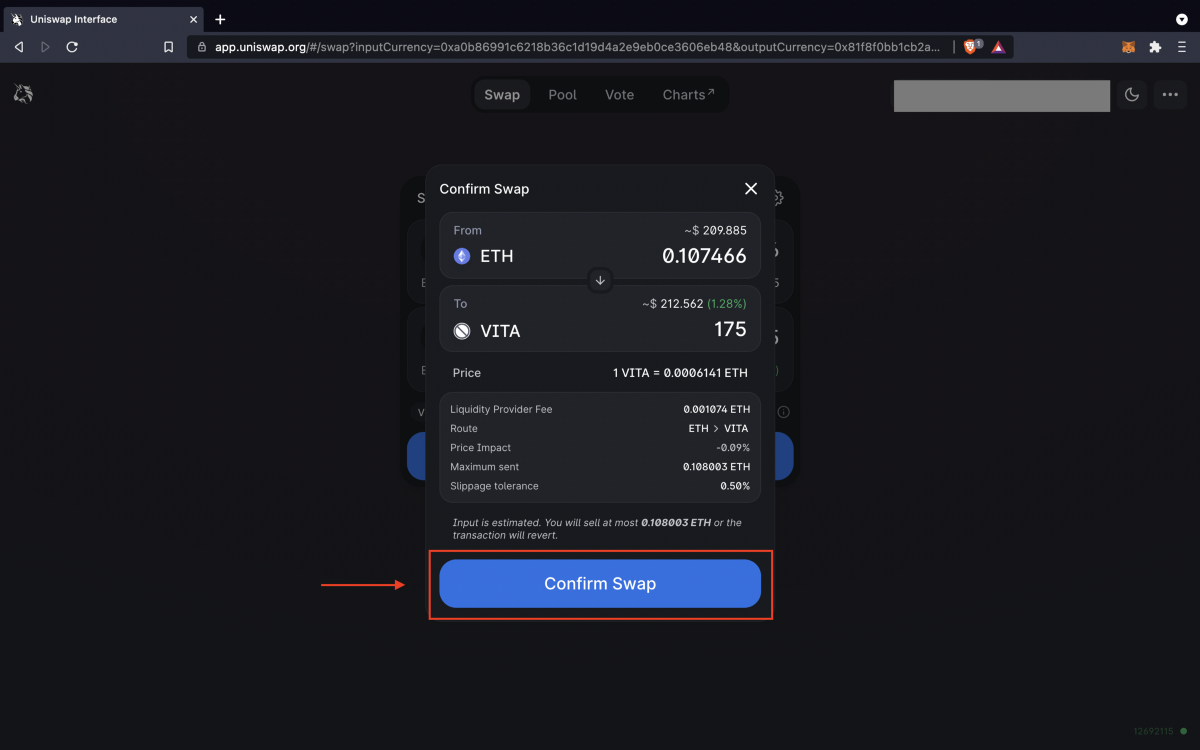
After you have specified the amount, click on “Swap”.
Double check that everything is correct and click on “Confirm Swap”. Follow the usual steps in your MetaMask wallet to confirm.
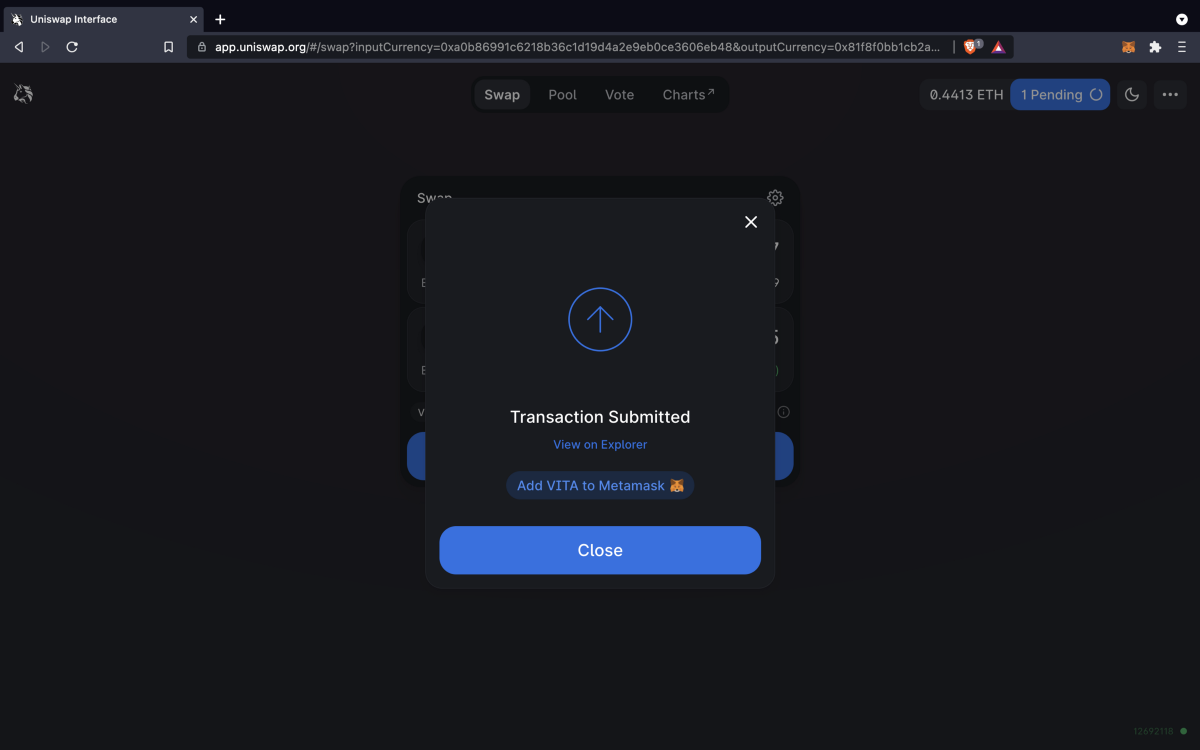
Before the transaction is completed, it needs to be processed which may take up to a few minutes. You may click on “View on Explorer” to track the progress on Etherscan.
Step 6: Add VITA token to MetaMask
While waiting for your transaction to confirm, click on “Add VITA to MetaMask” and follow the steps.

Step 7: Verify transaction
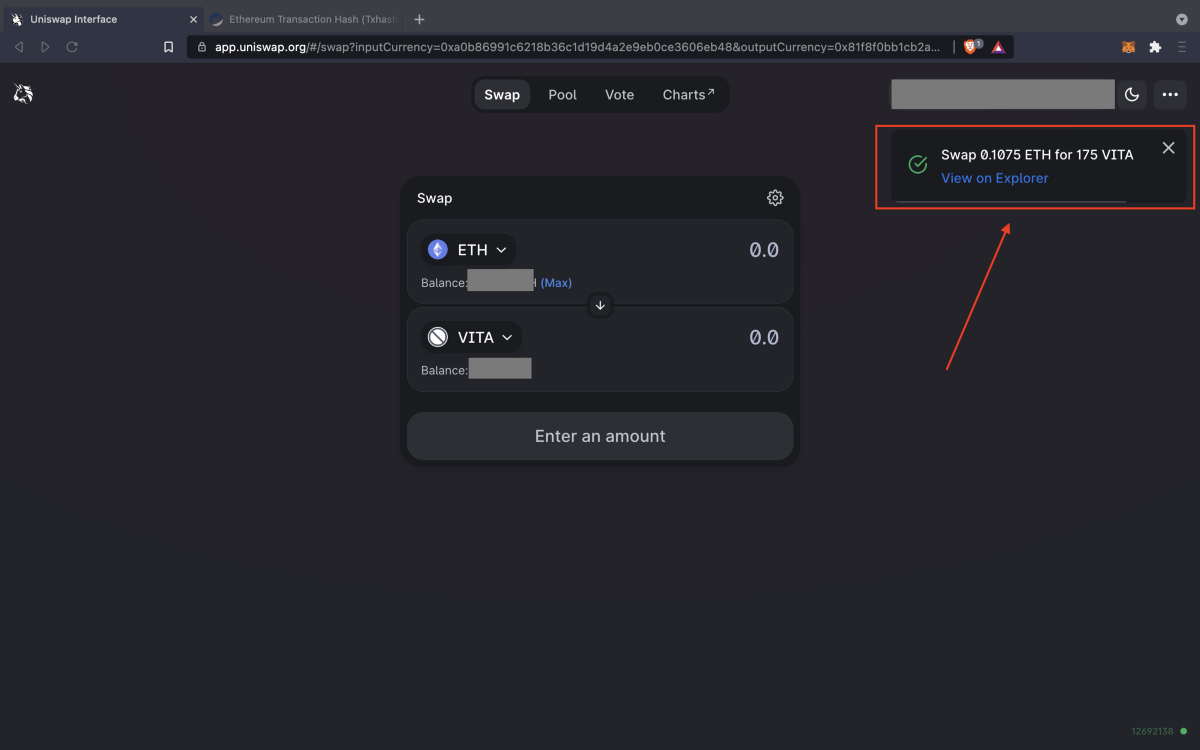
As a last step, wait for the transaction to clear. You will be notified through a banner in the upper right corner, as displayed here:
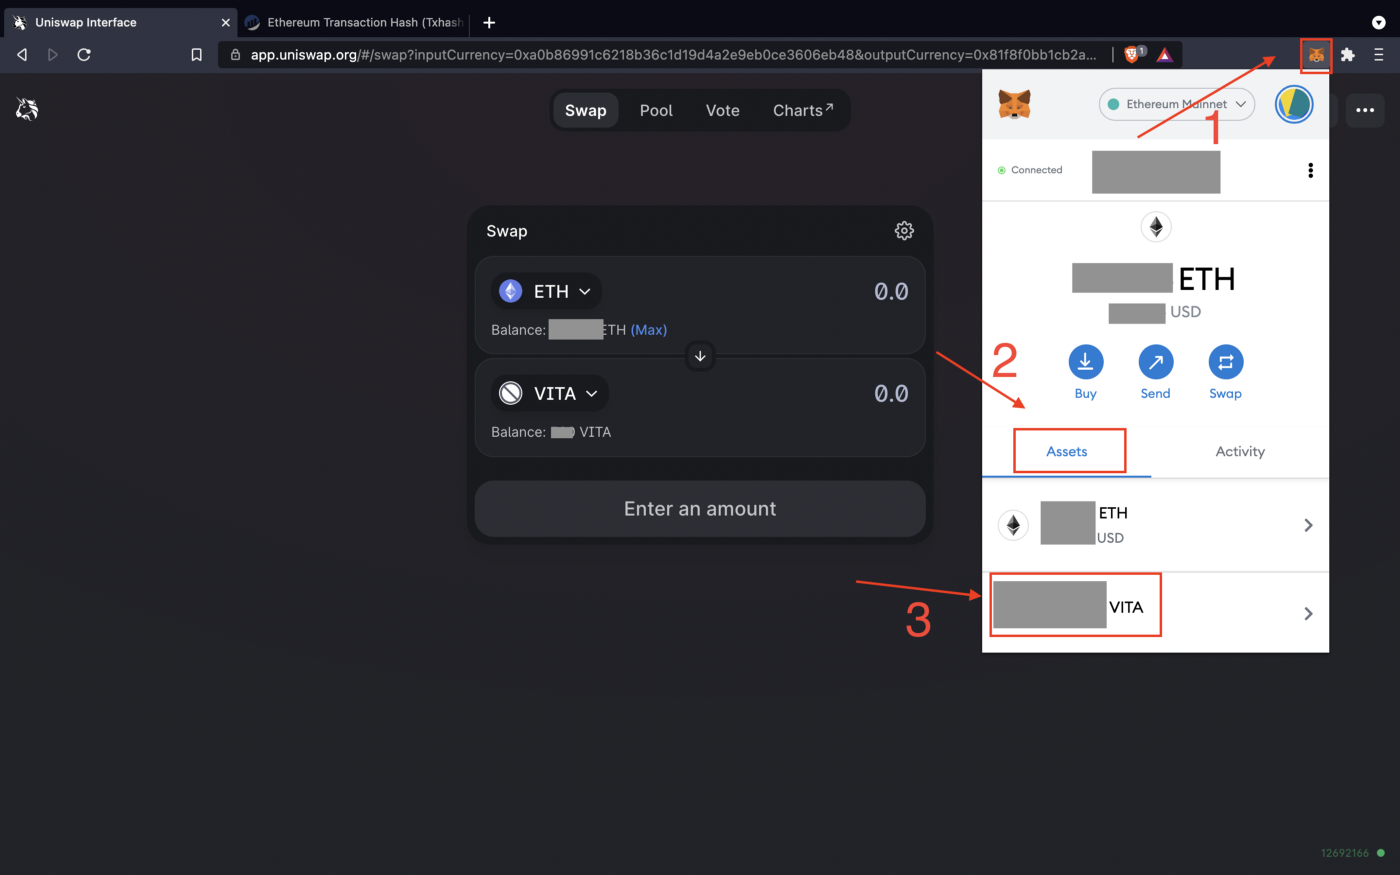
Finally, open your MetaMask wallet by clicking on the little fox icon on the top right-hand side. Next, click on “Assets” and verify that your desired amount of VITA has been added to your wallet.
If you cannot see VITA, follow these steps:
[If applicable] Step 8: Add VITA as custom token
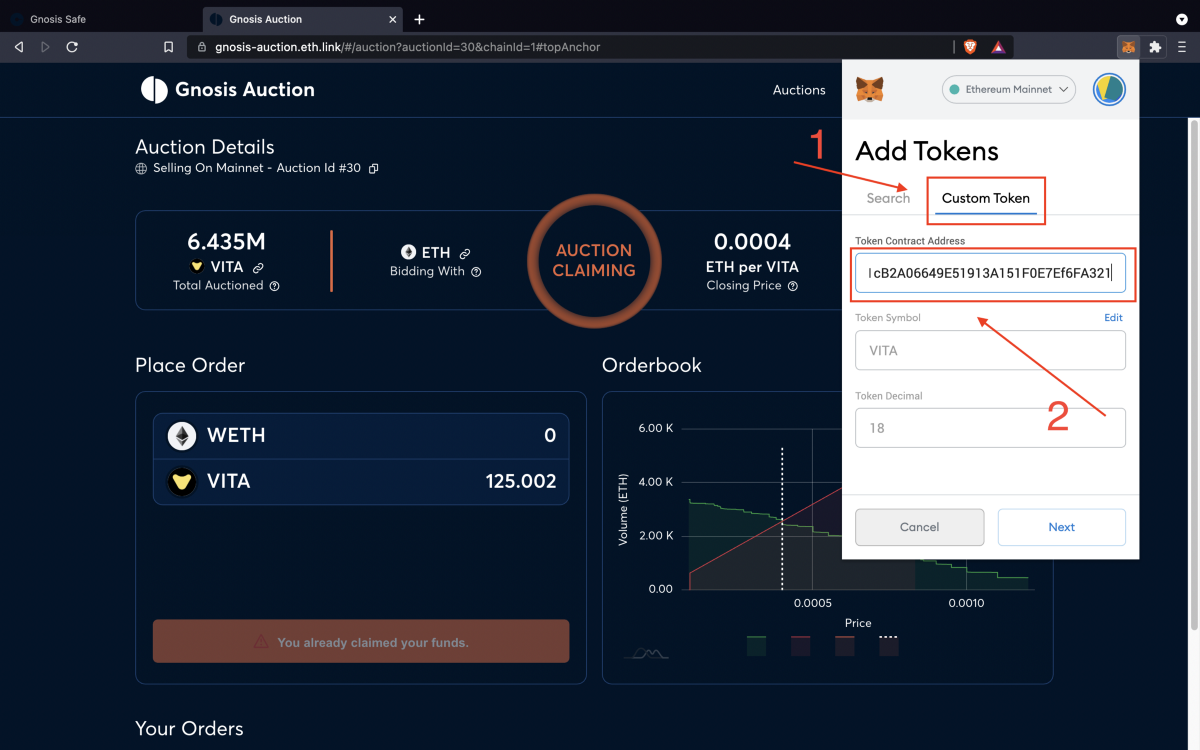
Click on “Custom Token” and add the Token Contract Address, which is 0x81f8f0bb1cB2A06649E51913A151F0E7Ef6FA321 (see also on Etherscan). The remaining two fields are filled automatically.
Click on “Next”.
Click on “Add Tokens”.
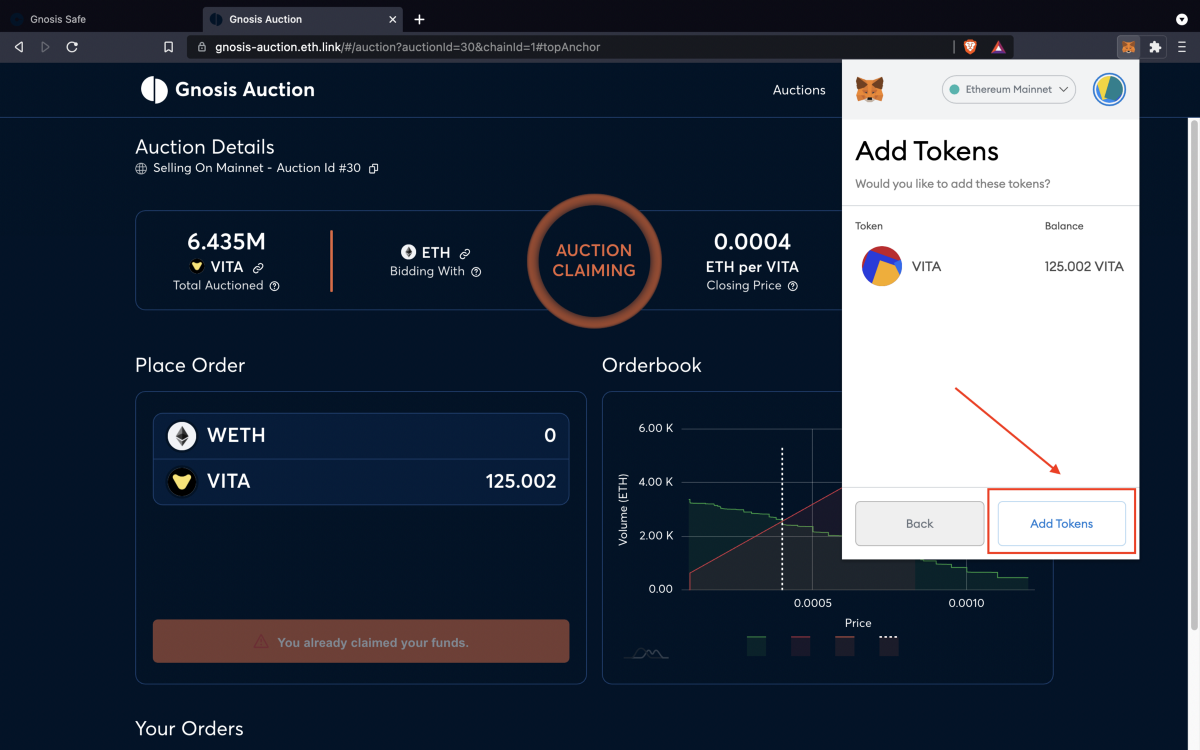
Now, your MetaMask shows your balance of VITA tokens.
Congratulations, you now have acquired VITA tokens and become a member of VitaDAO with full voting rights.
Stay tuned for another guide how to take part in VitaDAO’s governance processes and how to vote on proposals.
We hope to see you soon on Discord and our forum. VitaDAO is off to a great start and we cannot wait to get going. The real work begins only now!


